Key words
- Radio frequency(RF)
- Software Difine Radio (SDR)
- Universal Hacker Radio (UHR)
Abstract
This in the first one of a serie of posts where we are going to revese engineered a garage radio control to undertand how it works. In this first post We will describe how we have proceed in order to revese engineered the RF signal, present our conclusions about our findings and indicate which are going to be our next steps to hack the device.
This summer I wanted to introduce my self into the security RF world and what better way than take a day-to-dat RF device that we have in our homes and check how it works. We are writing this post to help those like us want to start in the radio security world explaing how we have start and proced to do our first investigation of a real device.
We highly recommened to take a look to Michael Ossmann’s video classes to get introduceded into the SDR wolrd. Also, we have used a software named Universal Hacker Radio (UHR) because it provides multiple useful fuctionalities such as:
- Spectrum analyser
- Signal Recorder
- Oscilloscope view
- Analyze interface
Indentify the signal frequency
To begin it is necesary to discover in which frequency the device is working. We recommened to check if your device is in FCCID database. It is a unique identifier assigned to a device registered with the United States Federal Communications Commission. Unfortunatly in our case it was not registed so we dag a little bit around Internet and we found that the device plays around the 868 KHz.
In order to check it UHR has an spectrum analyzer functionality but I prefer to used the osmocom_fft tool.
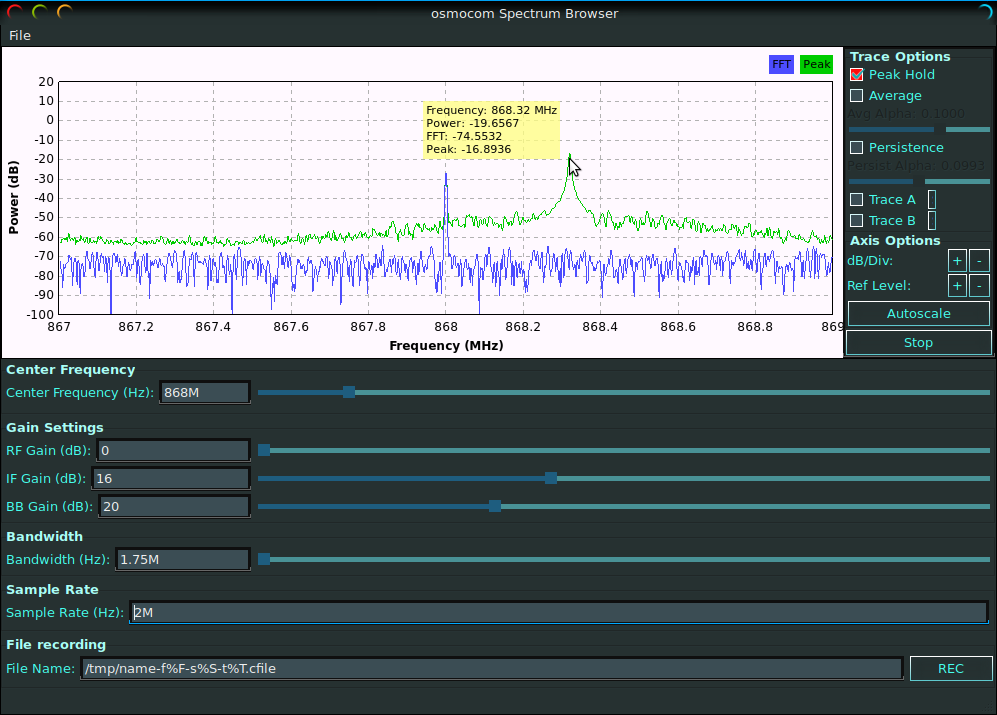
Tips
- To visulize properlly the signal, set the frequecy a little bit lower or higher that the one which you are checking.
- Check the peak hold option
- Send multiple signal to confirm that it is the signal that you are looking for.
- Remenber the HackRF has a limit of 2M samples per rate.
Recording the signal
To record the signal we like to used the URH recording tool because it show you in real time what you are recoding and it adds the record stream automatically to the analysis tab.
Signal analysis
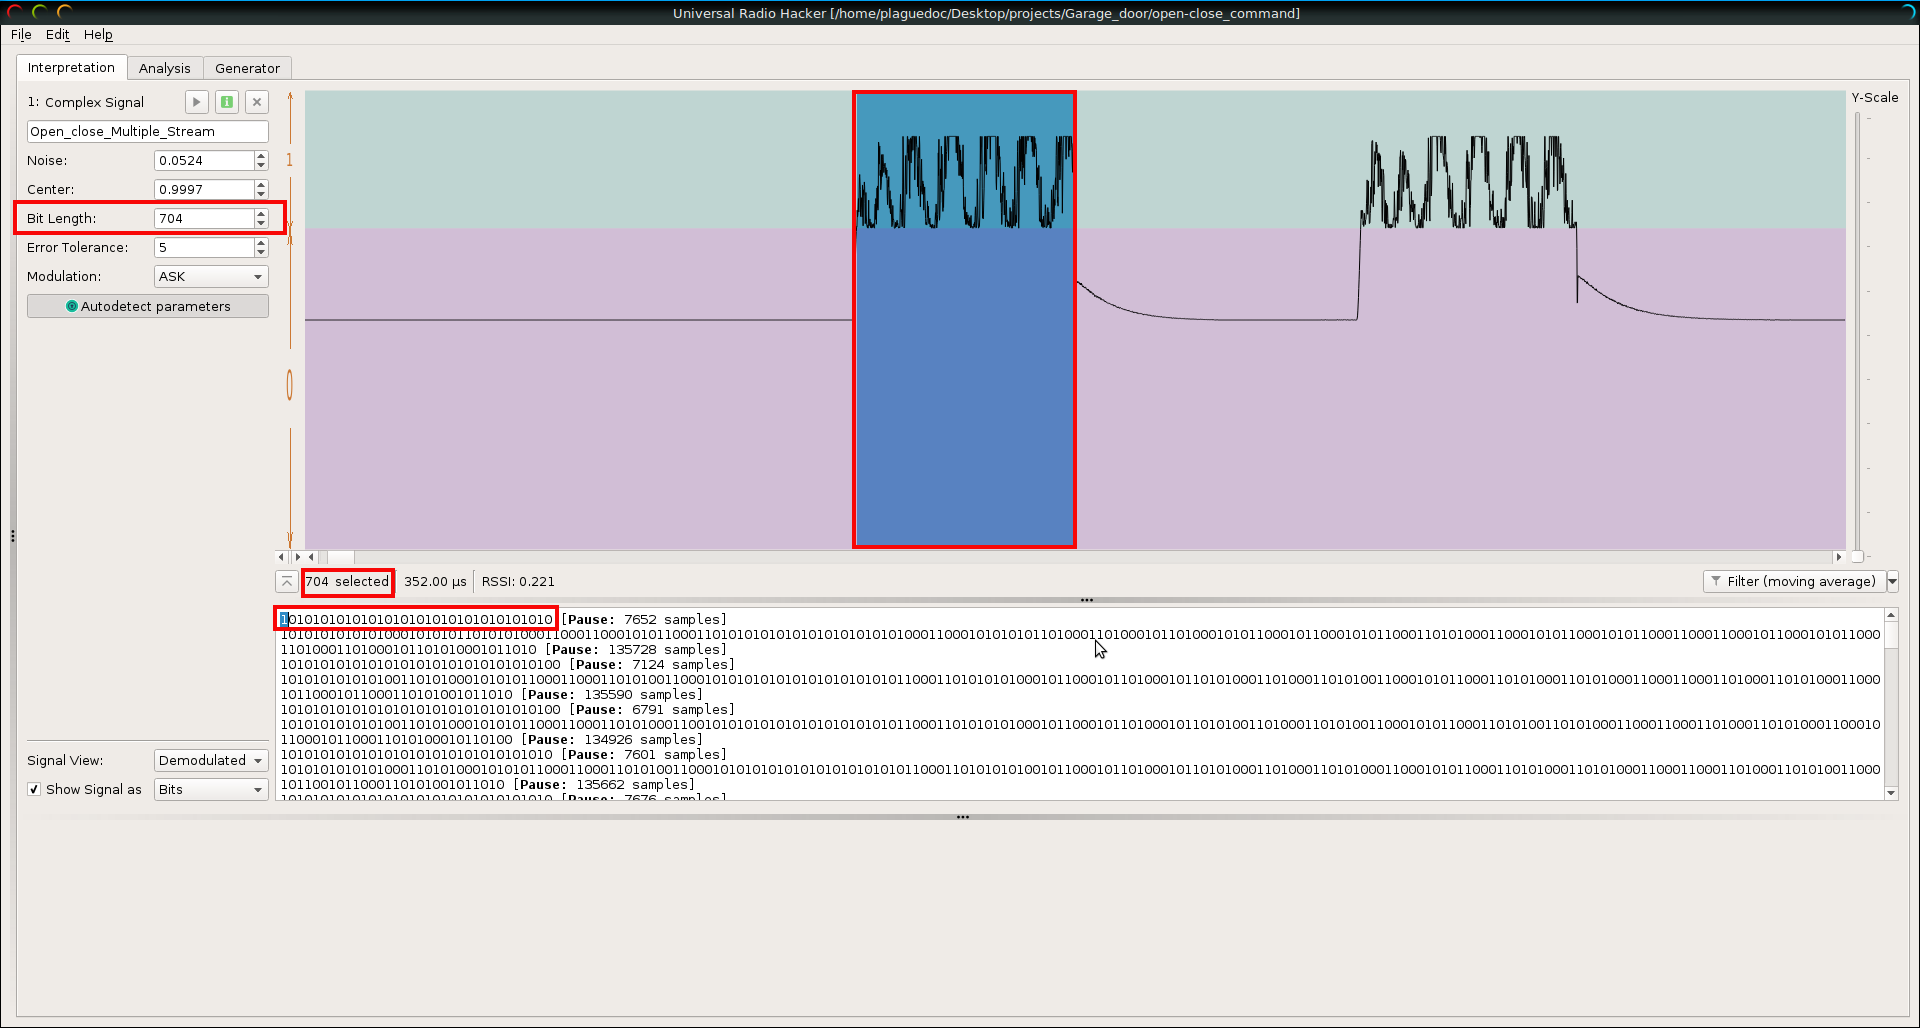
There are two esential things that it is necesary to know about the signal, which kind of modulation has been used and which is the bit legth/symbol length. Taking a look to the recorded signal and zooming in looks like it is a form of amplitude modulation that represents digital data, specifically it is On-Off-keys modulation. It is the simplest form of amplitude-shift keying (ASK) modulation that represents digital data at the presence or absence of a carrier wave.In its simplest form, the presence of a carrier for a specific duration represents a binary one, while its absence for the same duration represents a binary zero.


Now that we know what kind of modulation has been used it is easy to calculate the bit lenght using URH as is shown. Selecting manually the area that represents a single bit and introducing the output value into the “Bit Length” box. Another really useful thing is that in the bottom it is displayed the stream in bits, hex or ASCII and just by selecting in this case the first bit it is possible to check if the selected value is the appropriate.
Reversing the communication protocol
Now we can proceed to the analysis tab to reverse enginired the protocol. The first thing it is displayed in the interface are the stream of samples (one sampel per line) and the coding and view options.
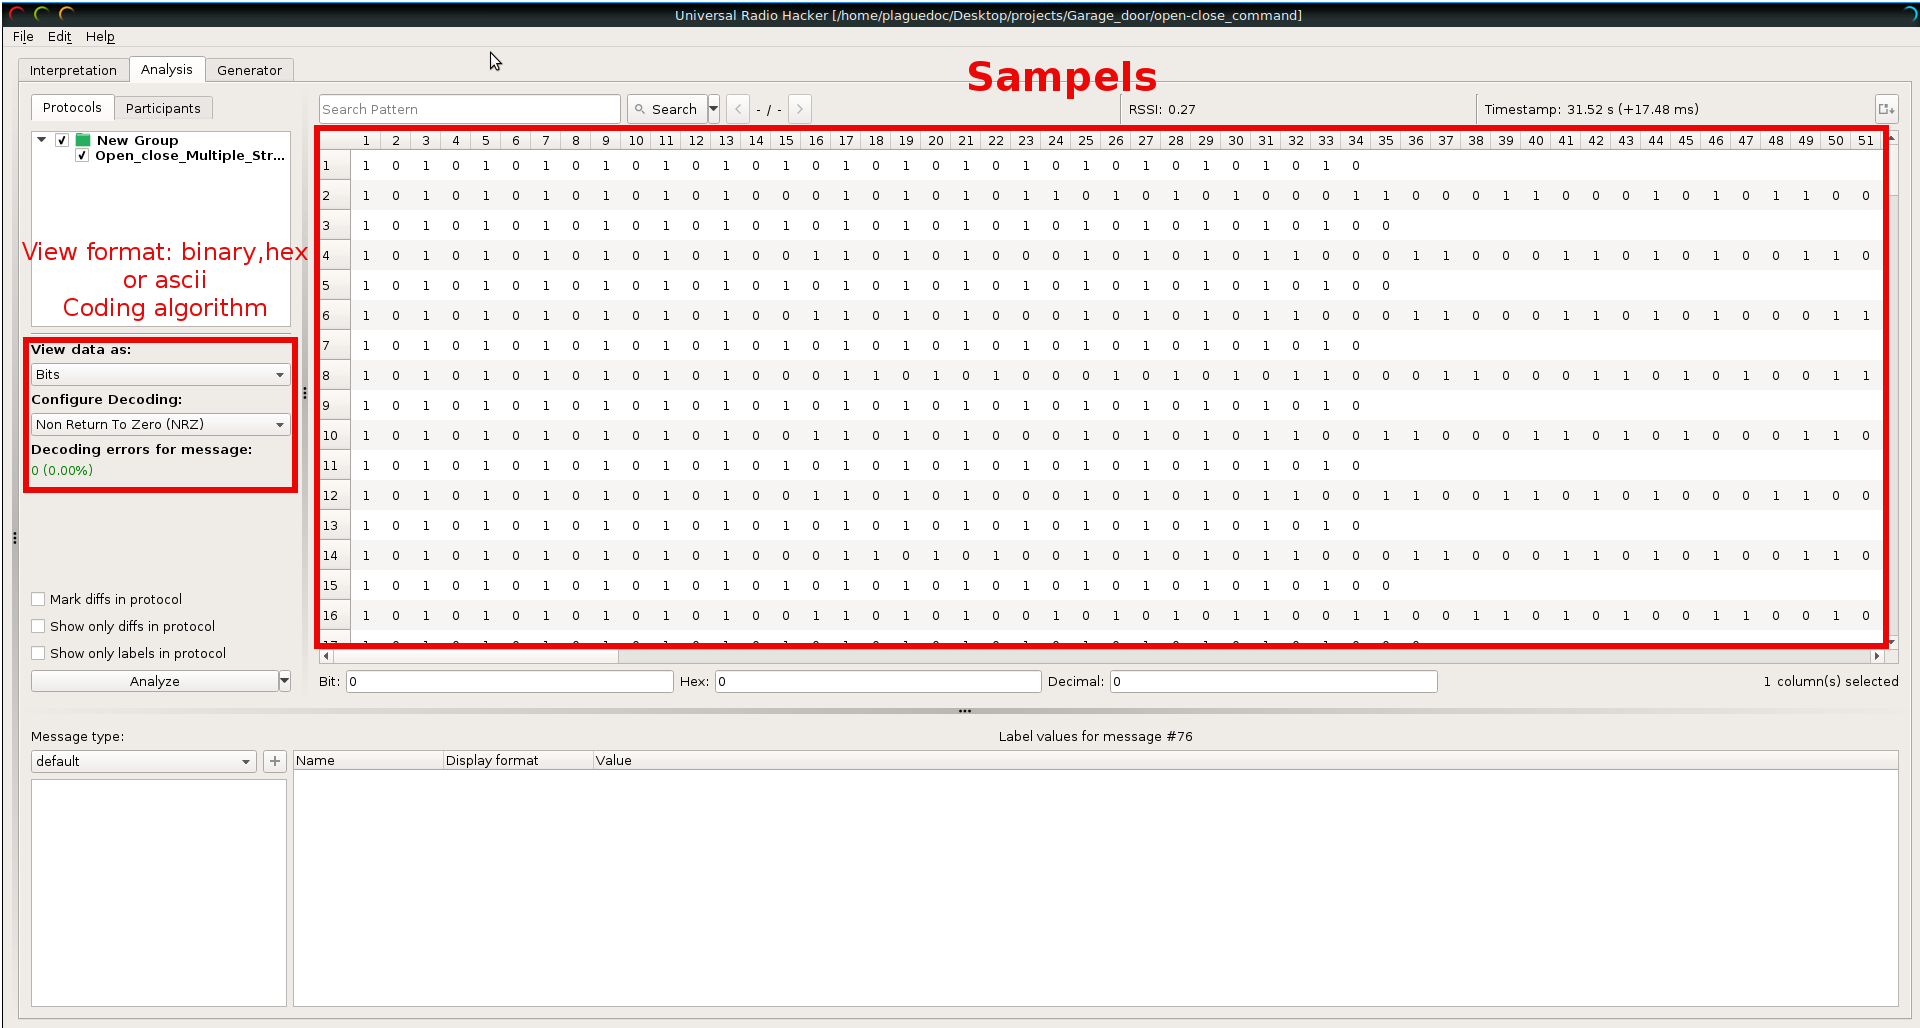
In order to analyse more easyly the sample we prefer to displayed it in hexadecial. The next thing that it is necessary to know is which encoding algorith has been used in the raw signal. To help us URH has already some of the classical algorithm implemeted: NRZ, NRZ-I, Manchester I (G.E Thomas), Manchester II (IEEE 802.3) and differential Manchester.
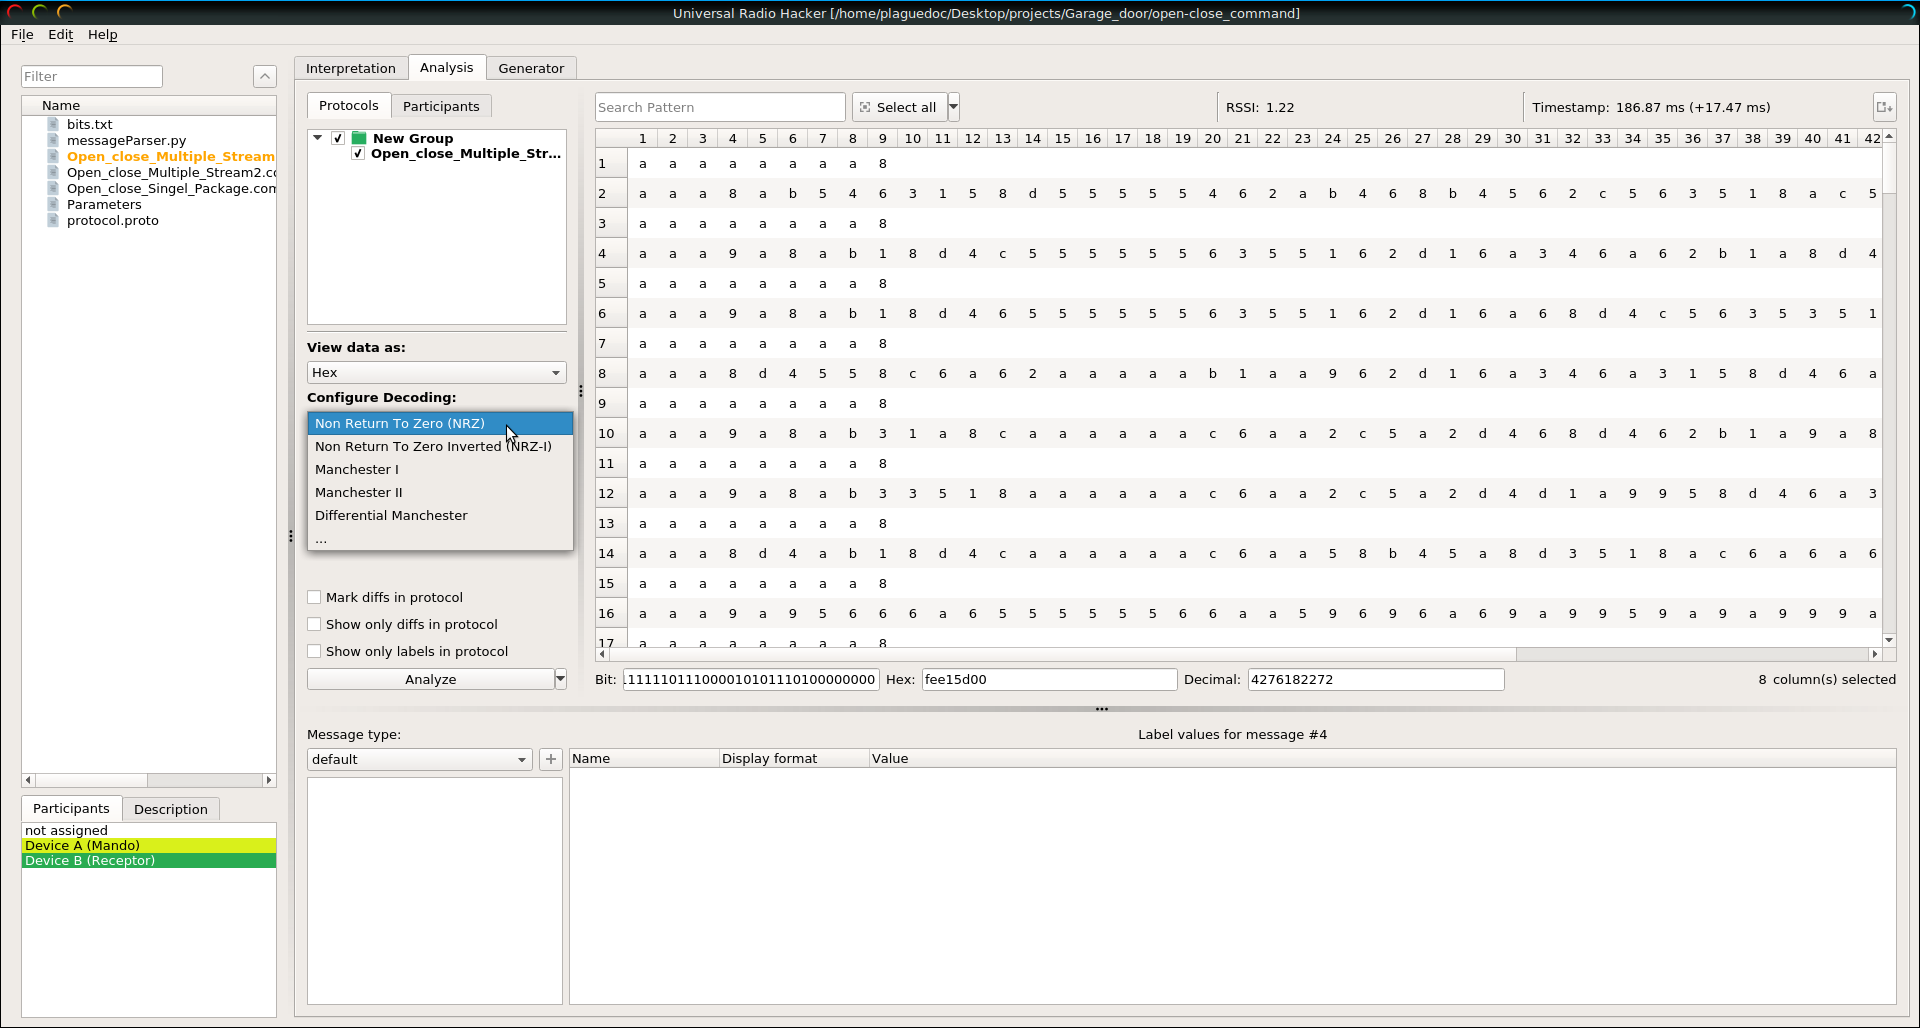
In this case the signal has been encoded with Manchester II. Basically what Manchester does is: A 0 is expressed by a low-to-high transition, a 1 by high-to-low transition (according to G. E. Thomas’ convention — in the IEEE 802.3 convention, the reverse is true)
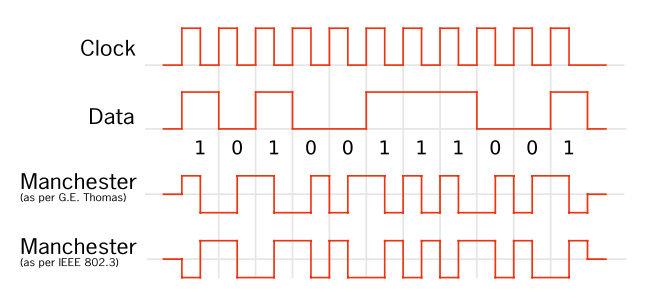
Note : However if the signal had been encoding with a custom encoding algorithm the program provided a tool to import or generate custom algorithms.
Once the encodig algorith has been identified is time to look for patterns and differencies beetween samples, group them by type and divide them in sections/labels.
To do it is as simple as selecting the messages, assinging a new type and divide it in diferent labels
As result it has been identified three types of messages send by the device:
Preamble (0xffff8): This packet is sent before any other packet as a premble to say to the recepetor that an order is going to be sent.
Start (0xfe1ea2ff): It is sent before the open-close message stream and indicates the sequence number that the follwing messages are going to have in case the open-close button is clicked multiple times.
Open/close (0xfee15d00): It is the open/close message which is sent multiple times to garante that the command is recived by the receptor.
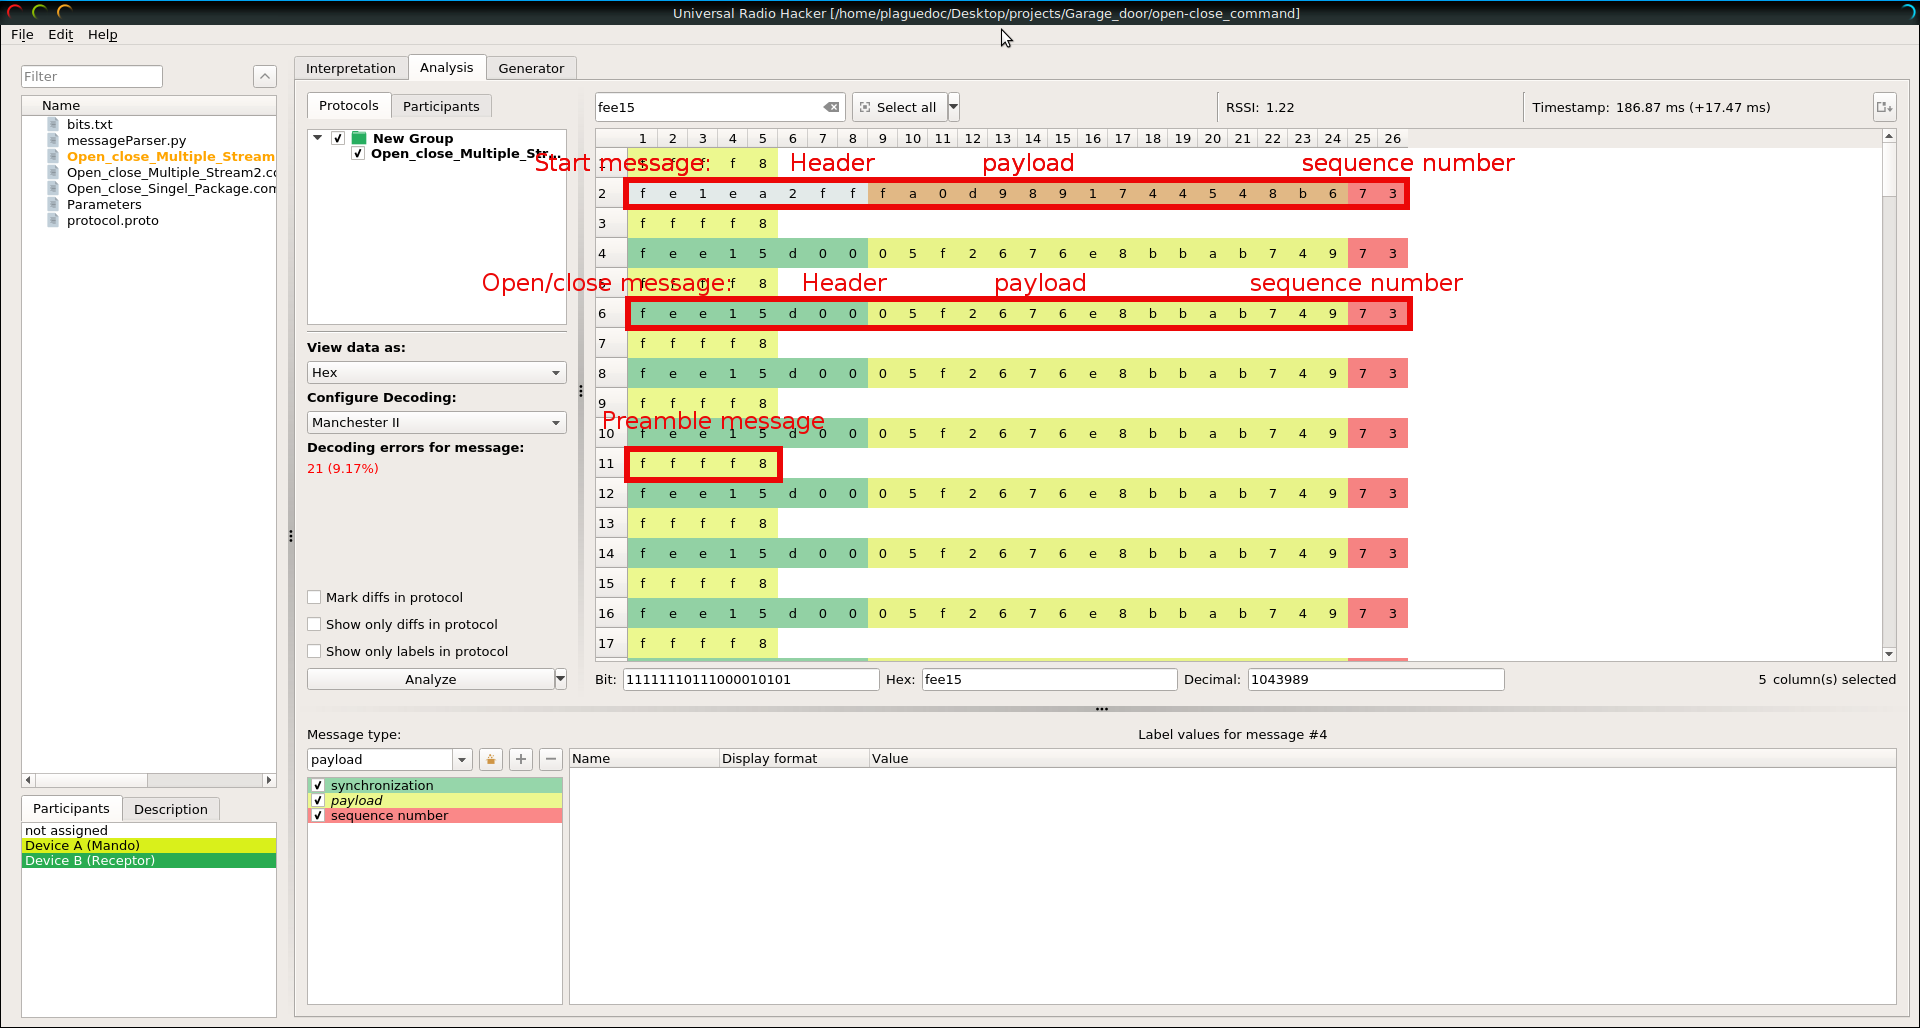
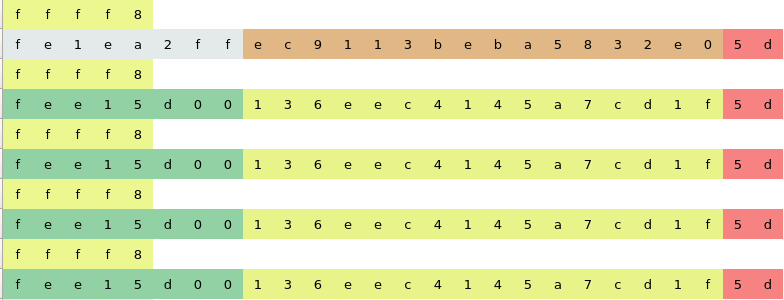
From here there are three interesting things the open/close payload, the start payload and the sequence number. Every time that the controller is clicked the sequence number and the payloads change which indicated that the device has a rolling code system to prevent replay attacks.

Conclusions
Thanks to the reversing protocol process now we know how the device works but we are not able to guess and replay a valid crafted message due to the rollig system and because it is unknown which algorith is been used. In the next posts we pretend to access the password seed or seeds that are saved inside the device via hardware, find out which algorinth is used and try to brute force the key in order to open de garage door.